Tuesday, April 15, 2014

Salsa!

It always seems so convenient to buy salsa in a jar, or even from the fridge section so it's "fresh". Bet you didn't know if only takes about 10 minutes to make your own. It is ridiculously easy! It only takes a few ingredients, a food processor (I love this one) and voilĂ ! Salsa. 


Salsa
  • 6 small/medium tomatoes
  • 1/2 cup (or more) cilantro
  • 1/2 small red onion
  • 2 garlic cloves
  • 1/2 chili pepper (or more or less depending on how spicy you like it) 
  • Juice of one-two limes
  • Salt to taste
  1. Put garlic in the bowl of your food processor and pulse a few times until it's fine.
  2. Roughly chop your tomatoes and onion and add them along with the cilantro, salt, lime juice and chili pepper to the processor. (Use caution with how much chili pepper you add if you're a wimp like me. Start with a small piece!)
  3. Pulse a few times until the salsa has your desired about of texture. The less you pulse the chunkier it will be. Don't pulse too much, or it will become very frothy. 
Fancy Food Thoughts contains some contextual affiliate links which advertisers have agreed to pay a commission if a purchase is made from that click-through. Everything I recommend are products I use & love!

Tuesday, April 8, 2014

The Humbled Homemaker Guest Post: 10 Allergy-Free Treats for Easter

I had the pleasure of writing a guest post for The Humbled Homemaker. It's such a hard thing to deal with food allergies during the Holiday's when there is so much that you have to avoid, especially for little ones! Head on over to The Humbled Homemaker to check out 10 Allergy-Free Treats for Easter! Enjoy!


Sunday, April 6, 2014

Lemon Bundt Cake (Gluten Free, Dairy Free, Soy Free, Nut Free)

This would be absolutely perfect to serve as a dessert or brunch item for Easter! It's light, tart, sweet, lemony & sings of spring with every bite. I always forget how satisfying lemon is. It's a very refreshing change to my taste buds. If you're going to make this, be sure it's for a group of people. Or else you MIGHT end up eating half the cake yourself. Not that I've ever done anything like that before….


LEMON BUNDT CAKE (Gluten + Dairy Free)
  • 2 1/4 cup Sarah’s Gluten Free Flour Mix
  • 3/4 teaspoon salt
  • 1 teaspoon aluminum free baking powder
  • 1/2 teaspoon baking soda
  • 3/4 cup earth balance soy free spread
  • 1 1/2 cups sugar
  • Zest of two large lemons
  • 3 large eggs
  • 2/3 cup full fat canned coconut milk
  • 1/4 cup lemon juice
  • 1 teaspoon vanilla extract
  • 12-15 drops lemon essential oil (optional – it’s a great addition, but can be made without!)
  • 1 Lemon Simple Syrup (see recipe below)
  • 1 Tart Lemon Icing (see recipe below)


1. In the bowl of your electric mixer, using the paddle attachment, c
ream the earth balance and sugar until light and fluffy about 4-5 minutes.
Preheat oven to 350 degrees.

2. With the mixer on medium speed, add eggs one at a time, then add lemon zest. 

3. In a separate bowl, mix the coconut milk, lemon juice, vanilla and lemon essential oil (if using) and set aside.

3. In a separate bowl mix together the gluten free flour, salt, baking powder & baking soda. Reduce the mixer to low speed and add the flour and coconut milk mixtures alternately to the batter until blended.

4. Pour batter into greased and floured pan.  Bake for 30-40 minutes until cake is springy and a toothpick will come out clean.

5. After 10 minutes, remove the cake from the pan and set it on a cooling rack over a tray or sheet pan. Spoon the lemon syrup over warm cake.

6. Wait until the cake has cooled, then drizzle with tart lemon icing.

LEMON SIMPLE SYRUP
Combine 1/2 cup granulated sugar with 1/2 cup lemon juice in a small saucepan and cook over low heat until the sugar dissolves. Allow to cool.

TART LEMON ICING
Combine 1 1/2 cups powdered sugar and 2-3 tablespoons lemon juice. If you would like a less tart frosting, use half lemon juice, half non-dairy milk.


Fancy Food Thoughts contains some contextual affiliate links which advertisers have agreed to pay a commission if a purchase is made from that click-through. Everything I recommend are products I use & love!


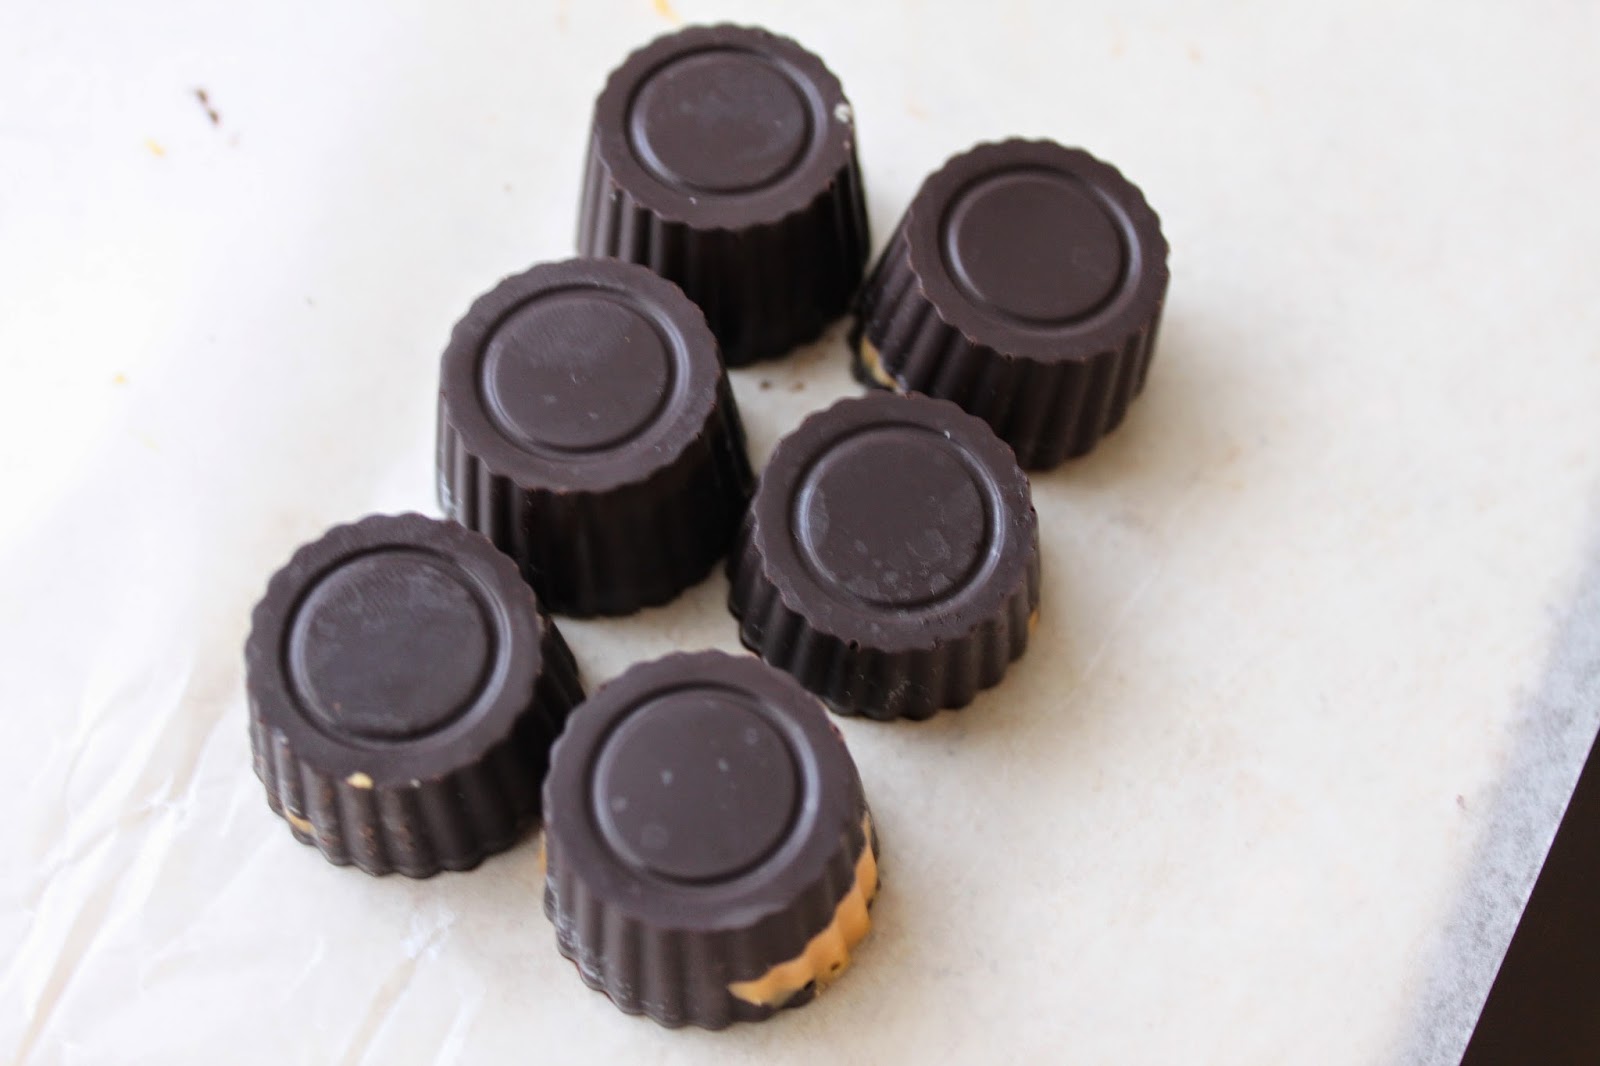
Homemade Peanut Butter Cups (Dairy, Soy + Sugar Free!)


Who knew you could so easily make your own peanut butter cups with just a few ingredients! This was quite a wonderful discovery for me since peanut butter + chocolate is in my top 5 favorite things of all time. I found this silicone mold to use that just makes them that much cuter, and when they're cute they taste better too, right?!


To assemble peanut butter cups, prepare chocolate and spoon into the silicone mold 1/3 of the way up. I swirl the chocolate around a bit so it comes up the side. Place mold into the freezer for 5-10 minutes until chocolate sets. Bring chocolates out of freezer and put a dollop of peanut butter into each cup, covering the peanut butter with another layer of chocolate. Place back in freezer to set before eating.

*I store my chocolates in the freezer since they seem to do better when cold.


Stevia Sweetened Dark Chocolate 
Melt shortening in the microwave or in a double broiler. Add liquid stevia, then add cocoa powder and mix until completely smooth. If you want your chocolate thinner, add more melted shortening. 


Fancy Food Thoughts contains some contextual affiliate links which advertisers have agreed to pay a commission if a purchase is made from that click-through. Everything I recommend are products I use & love!
Peanut Butter + Jelly Cookies (Gluten Free, Vegan, Refined Sugar Free)

Peanut butter + jelly. I remember eating Jiff or Skippy on Wonder Bread with a huge spoonful of Smucker's strawberry jam as a kid. The entire sandwich would stick to the roof of my mouth and I'd have to drink a 16oz glass of whole milk to wash it down. Boy were those the days. The days of pure naivety. The day's before milk made me feel like I had just drank arsenic. Lucky for all of us, these cookies are gluten free, vegan & refined sugar free! So go ahead, eat more than one!


Peanut Butter + Jelly Cookies (Gluten Free, Vegan, Refined Sugar Free)

  • 1/2 cup peanut butter*
  • 1/4 cup Spectrum Organic Shortening
  • 2 Tablespoons honey (replace honey & stevia with 1/4 cup coconut sugar if desired)
  • 20 drops liquid stevia
  • 1 teaspoon vanilla
  • 4 1/2 teaspoons Ener-G Egg Replacer + 4 Tablespoons water* (or 1 egg or flax egg, see notes below)
  • 2 Tablespoons millet flour
  • 2 Tablespoons Oat flour
  • 1/2 teaspoon baking soda
  • pinch of salt
  • 4-5 Tablespoons favorite jam or preserves 
Preheat oven to 350 degrees.

In the bowl of your food processor, blend egg replacer + 4 Tablespoons of water until very thick and frothy. (DO NOT skip this step! The egg replacer must be beaten very, very well!) Add peanut butter, shortening, honey, liquid stevia & vanilla and blend until completely combined and smooth. Pulse in millet flour, oat flour, baking soda and salt until it comes together. 

Roll dough into tablespoon size balls and place on a cookie sheet lined with parchment paper or a silpat liner (I LOVE mine). Bake at 350 degrees for approximately 4 minutes. Remove pan from oven, push your thumb or a small spoon into the center of each cookie to make an indentation, then add a little dollop of jam. Immediately put back into oven and bake for 4-5 more minutes until cookies are slightly browning. 

Place on a cooling rack and let cool completely. Enjoy! 

*I've noticed certain peanut butters tend to make a runnier dough. If you're not able to roll your dough into a ball right from the processor, place dough in refrigerator until it sets up enough to handle.
*I had someone ask me if a regular egg could be used. I tried adding an egg and It wasn't half bad. The cookies get very fluffy. However, they were still eaten ;) 
I ALSO have tried this recipe using 1 Tablespoon flax + 2 Tablespoons water & the results were ok as well. Just know that if you chose to use a real egg or flax egg the results will not be exactly the same. 

Fancy Food Thoughts contains some contextual affiliate links which advertisers have agreed to pay a commission if a purchase is made from that click-through. Everything I recommend are products I use & love!

Stevia Sweetened Chocolate's (Dairy Free, Soy Free, Sugar Free!)

The stores are bursting with chocolate bunnies and Easter candies right now! My kids are enamored by all of it and were really excited that we could make our very own Easter bunny candies! What a fantastic project to do with your kiddos, especially those who can't eat store bought chocolate. We made our chocolate extra dark and used a really cute chocolate mold I found at the craft store! There are lots of options right now you can pick up at your local crafting store, or if you want to order online, Here are some really cute ones!  


Stevia Sweetened Dark Chocolate 

Melt shortening in the microwave or in a double broiler. Add liquid stevia, then add cocoa powder and mix until completely smooth. If you want your chocolate thinner, add more melted shortening.  

*I chose to use shortening over coconut oil because I've found it to be more stable. If you prefer coconut oil, you may have to adjust amounts to get the right thickness. It's best to keep the chocolates in the freezer until the kids are ready to eat them because as they become room temperature they tend to be a little more delicate. 


Fancy Food Thoughts contains some contextual affiliate links which advertisers have agreed to pay a commission if a purchase is made from that click-through. Everything I recommend are products I use & love!

Saturday, April 5, 2014

Allergy Friendly Easter Bunny Cupcakes (Grain Free, Vegan, Refined Sugar Free!)

I anxiously waited for the sound of my little red kitchen timer to ding, letting me know that the cupcakes I had put into the oven 17 minutes prior were finished. That moment you open up the oven door and peek in to get the first glance of a new recipe is always daunting. I hardly ever peek earlier than the chime. I don't really know why, I guess I just like to look in when it's completely finished. That way I see it exactly as it will be. It makes me nervous to look in-between. This particular occasion when I saw the chocolatey cracking tops, I had a good feeling. The kind you get when you know you've nailed it but you don't want to pat yourself on the back prematurely. No counting my chickens here. But I knew. That day my mini chocolate cupcakes with peanut butter frosting were born.


With Easter coming up, I knew I wanted to make all my own treats and candies for my kids. We obviously are on a very restrictive diet, not to mention the food dye and additives in all of the store bought goodies!!! YIKES! I decided I better get to work figuring out what tasty treats we would be enjoying. My four year old daughter is absolutely obsessed with cupcakes. She watches cupcake tutorials on youtube and wants to have her own baking show. No surprise she had already been watching Easter cupcake tutorials these past few days. I literally consulted with her on what I should do. This is what we came up with. Allergy friendly, dye free, additive free (and really cute may I add) Easter bunny cupcakes.


I think they are cute even without their faces on!


They remind me of miffy. If you're a parent you will know what I'm talking about. Sweet little bunny.


My kids absolutely loved these. 


My sweet girl styled and shot this picture 100% by herself. I told her I would post it on the blog and she is ecstatic. Maybe this is the beginning of her job as a food stylist/cupcake genius. 


The cute little easter bunny ear cutouts can be found here! I taped skewers to the back of them because I didn't have any toothpicks! Obviously toothpicks would be ideal.

To assemble the cupcakes:
  1. Prepare and cool cupcakes, prepare frosting & chocolate.
  2. Frost the cupcakes, and dip them in unsweetened shredded coconut. 
  3. Place the bunny ears where you would like them.
  4. Pour the melted chocolate into a small ziplock or piping bag with a very small hole cut in the corner. Pipe on the eyes, nose, and whiskers. The smaller the hole, the finer the details will be. If your chocolate is too warm and runny, let it cool off a bit before using it. 
Enjoy!

Allergy Friendly Easter Bunny Cupcakes (Grain Free, Vegan, Refined Sugar Free)

  • 3 cups almond meal (Spoon measured) 
  • 2 level TBS coconut flour
  • 1 cup cacao powder
  • 1/2-3/4 cup coconut palm sugar (depending on how sweet you like them)
  • 2 teaspoons baking soda
  • 1/4 teaspoon salt
  • ½ cup coconut oil, melted (I've also used organic palm shortening with perfect results!)
  • 1 cup coconut milk, full fat
  • 1 small avocado (mine was a very large avocado so I only used half!)
  • 6 tsp egg replacer blended with 6 TBS water in the blender or processor until frothy
  • 2 1/2 teaspoons vanilla extract
  • 2-3 tablespoons raw honey

Preheat oven to 350 degrees. 

In a large bowl mix the almond flour, coconut flour, cocoa powder, palm sugar, baking soda & salt. (Make sure to spoon measure the almond meal! Using a spoon, scoop into measuring cup & level off.) 

In the bowl of a food processor or blender, add the egg replacer and water and process or blend until its thick and frothy. Add coconut oil, coconut milk, avocado, vanilla and honey and pulse or blend until completely smooth. 

With a rubber spatula, gently fold the wet ingredients into the dry just until moistened.  It may seem dry at first, but will become thick and moist as you keep folding in. Put cupcake liners into a muffin tin & use an ice cream scoop filling the liners almost to the top. They cupcakes will puff up a bit. 

Bake at 350 degrees for 17-20 minutes. They should be slightly firm to the touch when finished. 


Allergy Friendly White Frosting

1 1/2 cups Spectrum Organic Shortening
3-4 Tablespoons raw honey 
Stevia (optional if sweeter frosting is desired, or use more honey)
1/2 teaspoon vanilla extract
2 teaspoons arrowroot powder, cornstarch or tapioca starch
pinch of sea salt

Add all ingredients to your kitchen aid mixer and beat on low speed until incorporated and then on high speed for a couple of minutes until frosting is very fluffy and light, scraping down sides of bowl as needed.


Stevia Sweetened Chocolate

3/4 Cups cocoa powder
5 Tablespoons Spectrum Organic Shortening
Liquid Stevia to taste

Melt shortening, stir in liquid stevia, stir in coca powder. If you want it thinner, add more melted shortening in small amounts until it reaches your desired consistency.

Fancy Food Thoughts contains some contextual affiliate links which advertisers have agreed to pay a commission if a purchase is made from that click-through. Everything I recommend are products I use & love!