Tuesday, April 22, 2014

Green Bean Chicken + Rice

I found this recipe a few years ago (check the original recipe out here) and my family absolutely loved it! I've shared it with many friends and it has become a great go-to meal for me! It only uses one pot, which means less dishes, and takes very little work! Although it's very, very simple, It's a seriously addicting meal.


Green Bean Chicken + Rice

  • 2 Tablespoons coconut oil
  • 1 1/2 pounds chicken, diced (I use boneless skinless thighs or breasts) 
  • 3 stalks celery, sliced
  • 1 large sweet onion, chopped
  • 2-3 teaspoons dried dillweed
  • 1 pound green beans, trimmed and cut (I've used fresh & frozen!) 
  • 2 cups basamati rice (cooking time is for white rice, brown rice will take longer)
  • 2 1/2 cups chicken stock (preferably homemade) 
  • 1 Tablespoon dijon mustard
  • 1 teaspoon salt
1. In a large stockpot or dutch oven, heat coconut oil to medium-high. Add chicken & cook until browned, then remove and place into a bowl.

2. Reduce heat to medium, add another Tablespoon of oil (if necessary) to pan, and then add chopped onion, sliced celery, salt & dillweed, cooking for a few minutes until the onion starts to become translucent. 

3. Stir in rice & cook for a minute more, then add chicken back in.

4. Add dijon mustard into your chicken stock & whisk to combine, then add to chicken & rice mix, bringing it all to a boil.

5. Once mix is boiling, *place green beans on top (do not stir them in!). Cover with a lid and reduce heat to medium low, letting simmer and cook for 20 minutes. 

6. When 20 minutes is done, turn stove off and let set for 10 minutes more. 

7. Stir everything together,  salt & pepper to taste, serve & enjoy!

*I like adding the green beans in early on because I like mine done all the way. If you want your green beans al dente, cook the rice mix for 10 minutes before adding the green beans.


Fancy Food Thoughts contains some contextual affiliate links which advertisers have agreed to pay a commission if a purchase is made from that click-through. Everything I recommend are products I use & love!

Monday, April 21, 2014

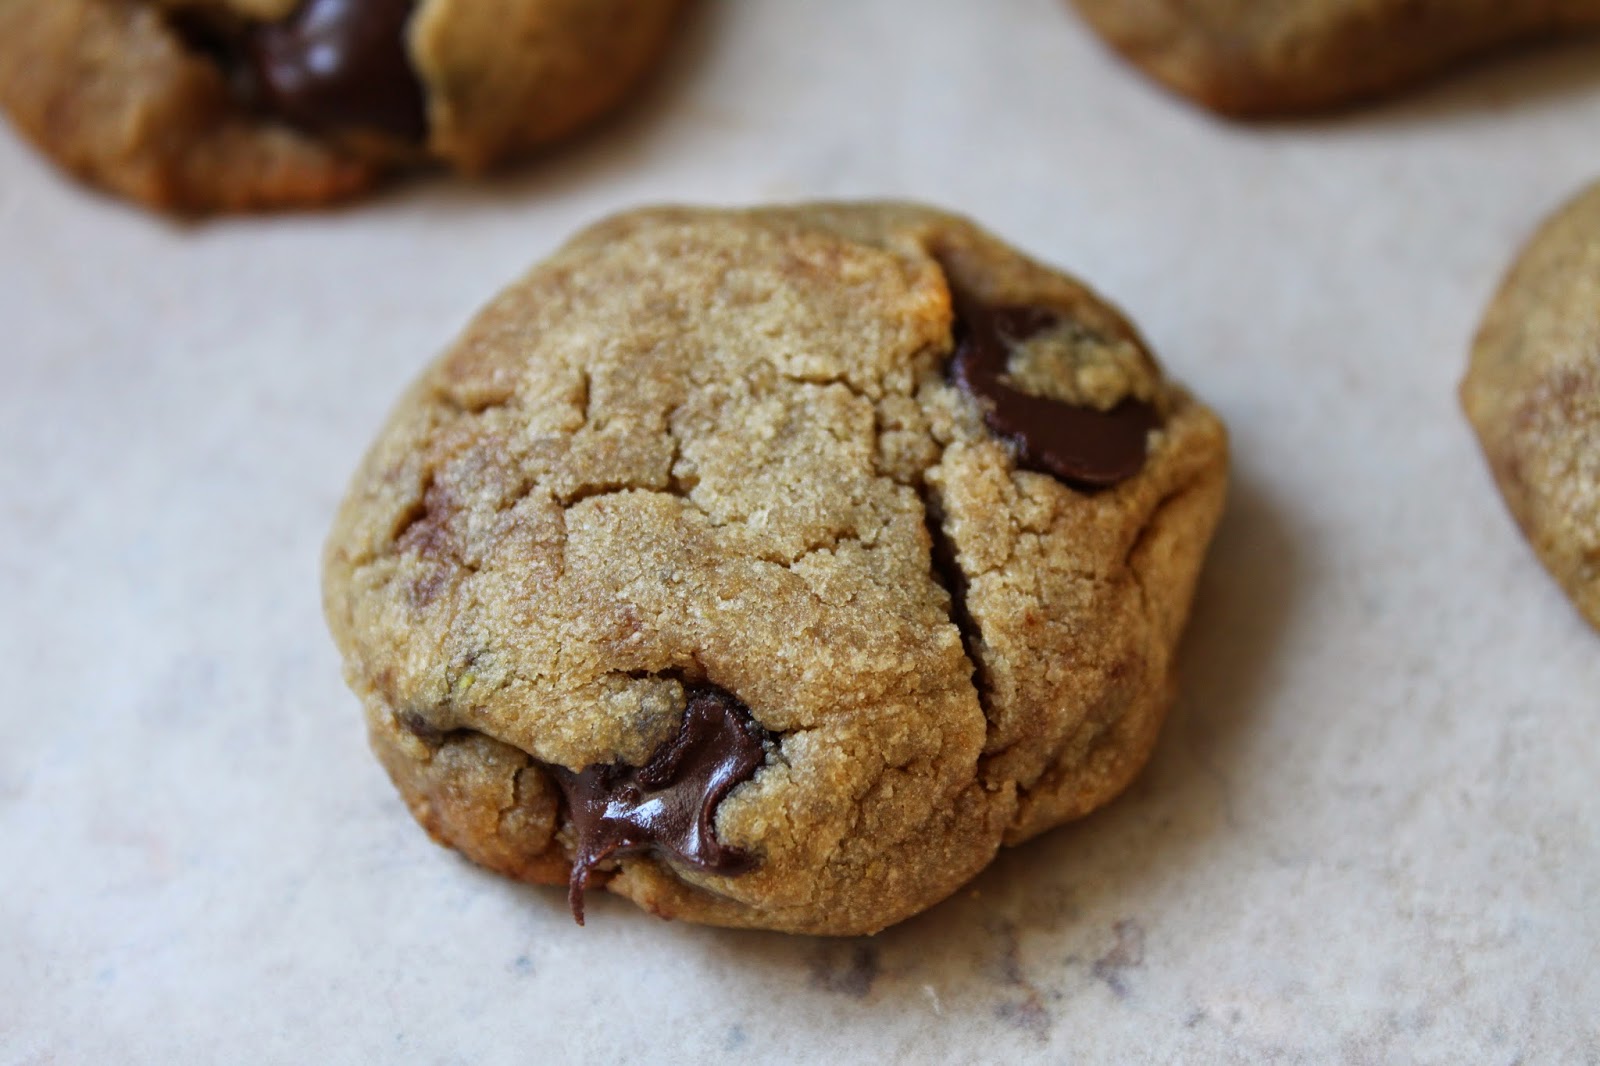
OMG Chocolate Chip Cookies! (Gluten Free, Vegan, Refined Sugar Free)

The thing I have missed most since eating differently are chocolate chip cookies. Is there really anything better than a moist, chewy, chocolatey cookie fresh from the oven? Here is the problem; My taste-buds wants Toll House. As you can imagine, I'm ALWAYS disappointed with the gluten free, dairy free, refined sugar free options. I mean, is it even possible to have chocolate chip cookies that don't taste like sawdust with those kind of restrictions? Until recently, the answer would have been NO, but this recipe puts the option of chocolate chip cookies back on the table. Preferably with a glass of ice cold homemade almond milk.

You may not believe what's NOT in them, but you also won't believe what IS in them!

It was quite the feat coming up with a soft and chewy chocolate chip cookie that was gluten free, vegan, refined sugar free, xanthan & guar gum free, and didn't use any processed egg replacer!
Seriously? It took me five gazillion tries. All fails in my book because they just didn't have that quality I was looking for. UNTIL, I finally said "OH MY GOSH! These are the ones." Then I shoved them down my husbands throat (ok, maybe he willingly ate them) and stared intensely at him as I waited for his every critique. He's not very critique-y, but I forced him to tell me EVERYTHING he thought of them. (I sound really pushy.) He chewed slowly, shook his head amicably and said "Mmmm. Yum. Good." My husband is not a caveman, I promise. But this was all I needed, because my husband looooovvvveeeesssss chocolate chip cookies more than any other dessert in the world. Mission accomplished.


OMG Chocolate Chip Cookies 

  • 1/2 Cup oat flour (I like THIS one! Sign up through my referral link & get $10 off!) 
  • 1/4 Cup brown rice flour (I've been using THIS brand & love the texture)
  • 1 Tablespoon coconut flour
  • 1/4 teaspoon baking soda
  • 3/4 Cup white navy beans, drained ( Crock Pot Beans Recipe, use water and leave out the salt & garlic!)
  • 3/4 Cup Spectrum Organic Shortening, melted
  • 1/4 cup coconut sugar
  • 2 Tablespoons honey (or two more Tablespoons coconut sugar) 
  • 15 drops liquid stevia
  • 1 Tablespoon vanilla
  • 1 Tablespoon golden flax meal + 2 Tablespoons water (make sure to use golden flax!!) 
  • 1/4 teaspoon salt
  • 1/2 cup favorite chocolate chips/chunks, homemade or store bought
  • 1/4 cup chopped walnuts (optional)

1. Preheat oven to 350 degrees

2. In a very small bowl mix golden flax meal with 2 Tablespoons water & let set for a few minutes while preparing other ingredients

3. In a separate small bowl, mix oat flour, brown rice flour, coconut flour & baking soda

4. In the bowl of a food processor, add drained navy beans, melted shortening, coconut sugar, honey, stevia, vanilla, salt & prepared flax meal. Process until very smooth, letting the processor run for about 30-60 seconds. Scrape down sides and process again for a few seconds if needed

5. Add the dry ingredients to the food processor and process for another 30 seconds, scraping down sides as needed. 

6. By hand, stir in chocolate of choice & walnuts if desired. Scoop the dough into tablespoon size dollops and place on a silpat liner or parchment paper 3 inches apart. You can also put the dough in the refrigerator for an hour and roll it into balls once it's chilled. Bake for 10-12 minutes or until edges of cookies are pale golden brown. Let sit on pan for 5 minutes after taking out of oven. Transfer to cooling rack and let cool completely.

I personally think these cookies taste the best once they've been out of the oven for about 15-20 minutes. They're still warm and so soft and gooey.

*I've made these a few times trying different things to see how they hold up, and they seem pretty versatile! I didn't have any navy beans on hand, so I used canned garbanzo beans (drained and rinsed) & they worked great! I'm pretty confident any white bean would work, they will just vary in taste slightly. I also tried them using 100% pure dextrose instead of coconut sugar & that also worked great!


Fancy Food Thoughts contains some contextual affiliate links which advertisers have agreed to pay a commission if a purchase is made from that click-through. Everything I recommend are products I use & love!

Tuesday, April 15, 2014

Homemade Chicken Soup

Chicken soup is one of my all time favorite meals. It's so wholesome and always makes me content after I've eaten it. This chicken soup is packed full of healthy veggies, homemade stock and hearty chicken. You can prepare your chicken/stock whenever you have time during the week to make putting this soup together a breeze. You will absolutely love the way this soup fills your entire house with comforting aromas.


Homemade Chicken Soup

  • 1-2 Tablespoons coconut oil
  • 1 yellow onion, peeled and chopped
  • 4 celery ribs, thinly sliced 
  • 6 large carrots, peeled and chopped
  • 1 pack white or crimini mushrooms, chopped
  • 2 medium zucchini squash, halved and sliced 
  • *2 large bone in skin on chicken breasts or 6 bone in skin on chicken thighs or whole chicken
  • (*see notes below) 
  • 1 bay leaf
  • 1/2 teaspoon dried oregano
  • 1/2 teaspoon dried basil
  • 1 1/2 teaspoon seal salt


*Prepare your chicken two ways:

1. The day before make a crock pot roasted chicken using the chicken & stock for soup.
2. Place whatever type of chicken you decide to use (bone in skin on breast, thighs etc or whole) into a large stock pot with at least 2 quarts (8 cups) of water. Bring to a boil & then place a lid on the pot and simmer on medium/low heat until chicken is completely done and falling off bone. This will take only a short time for the thighs (30-45 minutes) but a whole chicken will take considerably longer (1 1/2-2 hours depending on size). Make sure you plan for this! When chicken is done, remove from pot, pull off bones and set aside for soup, keeping your stock the chicken boiled in on hand for the soup as well. 


  1. On medium heat in a large soup pot or dutch oven, heat coconut oil, adding onion, half of your carrots and half of your celery. Let cook for 7-9 minutes until onions are translucent and veggies are softening. 
  2. Add the dried oregano, dried basil, bay leaf and salt. Give it a stir & then add the rest of your carrots, celery, zucchini & mushrooms, stirring and cooking for two minutes more. 
  3. Add two quarts (8 cups) of homemade chicken stock into the pot as well as the chicken you've prepared. If you don't have 8 full cups of homemade chicken stock, add whatever you have & substitute what you do not have with filtered water. You may need to adjust the spices and salt to compensate for flavor. 
  4. Bring soup to a steady boil, then reduce heat to simmer until the veggies are soft. The soup can stay at a low simmer with a lid on until you're ready to serve it. 
  5. Add more salt & pepper to taste if desired, and enjoy! 

Fancy Food Thoughts contains some contextual affiliate links which advertisers have agreed to pay a commission if a purchase is made from that click-through. Everything I recommend are products I use & love!


Salsa!

It always seems so convenient to buy salsa in a jar, or even from the fridge section so it's "fresh". Bet you didn't know if only takes about 10 minutes to make your own. It is ridiculously easy! It only takes a few ingredients, a food processor (I love this one) and voilà! Salsa. 


Salsa
  • 6 small/medium tomatoes
  • 1/2 cup (or more) cilantro
  • 1/2 small red onion
  • 2 garlic cloves
  • 1/2 chili pepper (or more or less depending on how spicy you like it) 
  • Juice of one-two limes
  • Salt to taste
  1. Put garlic in the bowl of your food processor and pulse a few times until it's fine.
  2. Roughly chop your tomatoes and onion and add them along with the cilantro, salt, lime juice and chili pepper to the processor. (Use caution with how much chili pepper you add if you're a wimp like me. Start with a small piece!)
  3. Pulse a few times until the salsa has your desired about of texture. The less you pulse the chunkier it will be. Don't pulse too much, or it will become very frothy. 
Fancy Food Thoughts contains some contextual affiliate links which advertisers have agreed to pay a commission if a purchase is made from that click-through. Everything I recommend are products I use & love!

Tuesday, April 8, 2014

The Humbled Homemaker Guest Post: 10 Allergy-Free Treats for Easter

I had the pleasure of writing a guest post for The Humbled Homemaker. It's such a hard thing to deal with food allergies during the Holiday's when there is so much that you have to avoid, especially for little ones! Head on over to The Humbled Homemaker to check out 10 Allergy-Free Treats for Easter! Enjoy!


Sunday, April 6, 2014

Lemon Bundt Cake (Gluten Free, Dairy Free, Soy Free, Nut Free)

This would be absolutely perfect to serve as a dessert or brunch item for Easter! It's light, tart, sweet, lemony & sings of spring with every bite. I always forget how satisfying lemon is. It's a very refreshing change to my taste buds. If you're going to make this, be sure it's for a group of people. Or else you MIGHT end up eating half the cake yourself. Not that I've ever done anything like that before….


LEMON BUNDT CAKE (Gluten + Dairy Free)
  • 2 1/4 cup Sarah’s Gluten Free Flour Mix
  • 3/4 teaspoon salt
  • 1 teaspoon aluminum free baking powder
  • 1/2 teaspoon baking soda
  • 3/4 cup earth balance soy free spread
  • 1 1/2 cups sugar
  • Zest of two large lemons
  • 3 large eggs
  • 2/3 cup full fat canned coconut milk
  • 1/4 cup lemon juice
  • 1 teaspoon vanilla extract
  • 12-15 drops lemon essential oil (optional – it’s a great addition, but can be made without!)
  • 1 Lemon Simple Syrup (see recipe below)
  • 1 Tart Lemon Icing (see recipe below)


1. In the bowl of your electric mixer, using the paddle attachment, c
ream the earth balance and sugar until light and fluffy about 4-5 minutes.
Preheat oven to 350 degrees.

2. With the mixer on medium speed, add eggs one at a time, then add lemon zest. 

3. In a separate bowl, mix the coconut milk, lemon juice, vanilla and lemon essential oil (if using) and set aside.

3. In a separate bowl mix together the gluten free flour, salt, baking powder & baking soda. Reduce the mixer to low speed and add the flour and coconut milk mixtures alternately to the batter until blended.

4. Pour batter into greased and floured pan.  Bake for 30-40 minutes until cake is springy and a toothpick will come out clean.

5. After 10 minutes, remove the cake from the pan and set it on a cooling rack over a tray or sheet pan. Spoon the lemon syrup over warm cake.

6. Wait until the cake has cooled, then drizzle with tart lemon icing.

LEMON SIMPLE SYRUP
Combine 1/2 cup granulated sugar with 1/2 cup lemon juice in a small saucepan and cook over low heat until the sugar dissolves. Allow to cool.

TART LEMON ICING
Combine 1 1/2 cups powdered sugar and 2-3 tablespoons lemon juice. If you would like a less tart frosting, use half lemon juice, half non-dairy milk.


Fancy Food Thoughts contains some contextual affiliate links which advertisers have agreed to pay a commission if a purchase is made from that click-through. Everything I recommend are products I use & love!


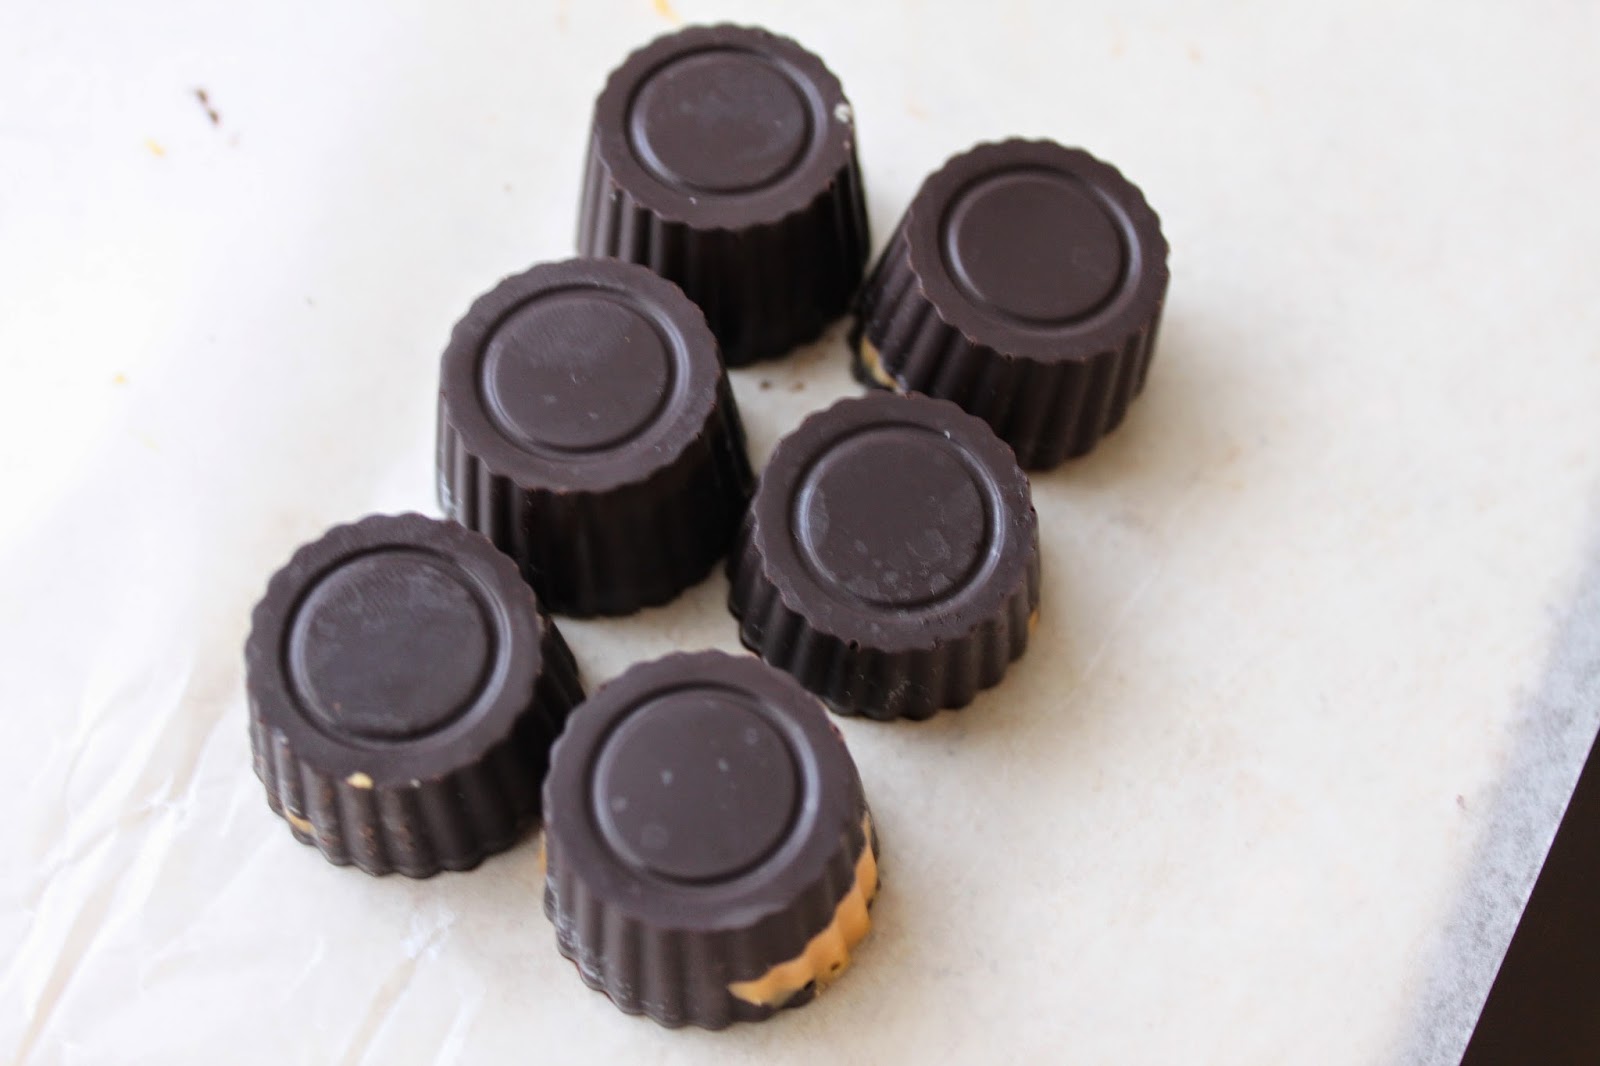
Homemade Peanut Butter Cups (Dairy, Soy + Sugar Free!)


Who knew you could so easily make your own peanut butter cups with just a few ingredients! This was quite a wonderful discovery for me since peanut butter + chocolate is in my top 5 favorite things of all time. I found this silicone mold to use that just makes them that much cuter, and when they're cute they taste better too, right?!


To assemble peanut butter cups, prepare chocolate and spoon into the silicone mold 1/3 of the way up. I swirl the chocolate around a bit so it comes up the side. Place mold into the freezer for 5-10 minutes until chocolate sets. Bring chocolates out of freezer and put a dollop of peanut butter into each cup, covering the peanut butter with another layer of chocolate. Place back in freezer to set before eating.

*I store my chocolates in the freezer since they seem to do better when cold.


Stevia Sweetened Dark Chocolate 
Melt shortening in the microwave or in a double broiler. Add liquid stevia, then add cocoa powder and mix until completely smooth. If you want your chocolate thinner, add more melted shortening. 


Fancy Food Thoughts contains some contextual affiliate links which advertisers have agreed to pay a commission if a purchase is made from that click-through. Everything I recommend are products I use & love!