Showing posts with label vegan. Show all posts

Sunday, November 9, 2014

Pumpkin Muffins (Gluten + Dairy + Refined Sugar Free + Vegan Option)

I seriously looooovvvvveeee pumpkin. Anything pumpkin, especially once the weather changes, is the best. thing. ever. Hot cup of coffee & a pumpkin muffin? Yes please!
These totally hit the spot & have become my families favorite treat. My husband loves his packed with chocolate chips. They're gluten + dairy free and have refined sugar free + vegan options, so they please everyone in my house! Enjoy!


PUMPKIN MUFFINS (Gluten & Dairy free with Refined sugar free and Vegan options)
  • 1 Cup Gluten Free Flour Blend (I use and love Sarah's G/F flour blend recipe
  • 3/4 tsp baking soda
  • 1/4 tsp sea salt
  • 3 eggs* (vegan notes below)
  • 1 cup pumpkin
  • 1 cup coconut sugar (substitute up to half with honey or maple syrup)
  • 1/3 cup applesauce or apple butter
  • 1/4 cup + 1 Tablespoon coconut oil, melted
  • 2 tsp cinnamon
  • 1/2-3/4 cup chocolate chips or carob chips (optional) 

Preheat oven to 350 degrees.

In a small bowl mix the gluten free flour blend, baking soda & salt. Set aside.

In a medium size bowl combine eggs, pumpkin, sugars, applesauce, coconut oil & cinnamon. Mix together until well combined.

Add the dry ingredients to the wet & stir until combined. Don't over mix.

Place 12 paper liners into a standard size muffin tin. Use an ice cream scoop to fill each cup & then bake at 350 degrees for 18-20 minutes. Muffins are done when the center is pushed on and is firm and doesn't sink but springs back.

*To make vegan, replace eggs with 4 1/2 teaspoons of ener-g egg replacer blended with 6 Tbs water until frothy. I also added 1 tsp baking powder to the dry ingredients to give the muffins a little more rise.


Wednesday, October 29, 2014

Ginger Cookies (Gluten free/Vegan/Refined sugar free)

So I'm on my iphone right now doing about 10 things at once, but one of those 10 things is making cookies, and I just had to post the recipe ASAP. I recently discovered I can't have chocolate (I know. Don't even get me started.) so I've been doing a lot of self discovery through finding non-chocolate recipes I like. First thing I've discovered along my journey? Everything needs chocolate. BUT these ginger cookies are pretty darn good, they're SUPER simple, and they make me feel like the holidays are coming, even if it is 86 degrees out.

Hope you enjoy!


Ginger Cookies (Gluten Free, Vegan, Refined Sugar Free)

1 Cup Honeyville almond flour
1/2 Cup oat flour (or 1/2 cup old fashioned oats) *you can use all almond flour if you want. Cookies will be much softer and chewier instead of crisp and chewy.
1/4 tsp baking soda
1/4 cup Spectrum shortening
1/4 cup honey
1/4 cup coconut sugar
1/4 tsp ginger
1 teaspoon cinnamon
1 teaspoon vanilla
1 Tablespoon molasses
Dash of salt

Preheat oven to 350 degrees.


  • Put everything in the bowl of your food processor and process until the dough comes together. If you're using oats instead of oat flour put your oats in first and pulse a few times until they're ground up, then continue adding everything else.
  • Roll into Tablespoon size balls and press down with a fork, or if you want a thicker cookie just leave them.
  • Bake at 350 for 7-9 minutes. Let cool on pan for a few minutes before transferring to baking rack.


These would taste really yummy frosted. Just saying.

Monday, June 30, 2014

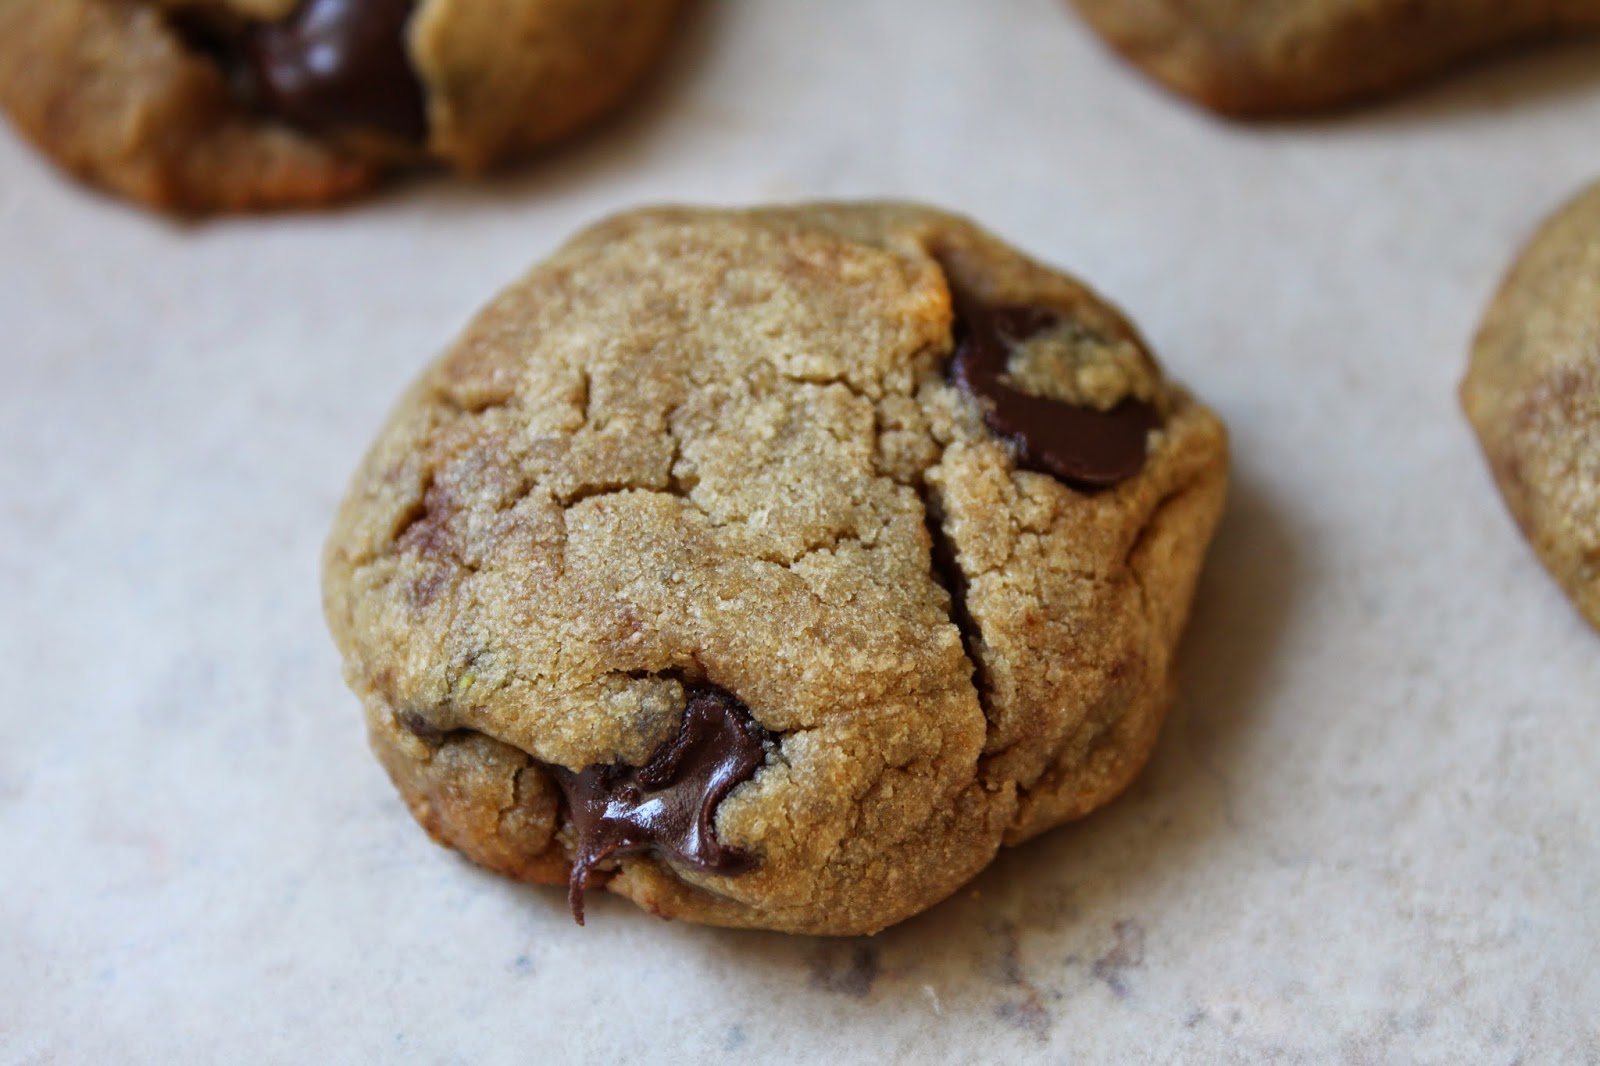
The Absolute Best Ever Gluten Free, Dairy Free Chocolate Chip Cookies (Vegan Option)

It's been far too long between posts lately! Such is life I suppose. I'm working really hard to get my health back in order, and hopefully I'll be able to share bits of my journey with you all at some point. So much to do, so little time & energy. I ALWAYS have time for chocolate chip cookies though! These are especially tasty, probably my favorite treat at the moment!

I was at Trader Joe's and saw they had these gluten free chocolate chip cookies & got really excited. Then I read the ingredients and got really un-excited. Of course they're filled with lots of unhealthy things as well as dairy, which I cannot have at all.  So, I had to make up my own for when I'm not being extraordinarily good and eating my OMG chocolate chip cookies (which have no refined sugar in addition to being g/f & vegan). I took them to one of my best friends who is my foodie friend and critic. She LOVED them, as did my husband, and her husband, and my brother, and sister-in-law….you get the point. Everyone loved them. These are my most requested treat I make, and I make them too much. Now I'm sharing them with you so YOU can make them too much. It's always more fun to eat a sweet treat when someone else is joining you, isn't it? 

If you're vegan, I used egg replacer with fabulous results! My friend who has been a vegan for years raved about them! YAY! win win. (You'll find notes below how to make them vegan).

I apologize for the lame pictures, they don't do these bad boys justice! This was a 'running out the door snap some iphone pictures' kind of day.


THE ABSOLUTE BEST EVER GLUTEN FREE/DAIRY FREE CHOCOLATE CHIP COOKIES (VEGAN OPTION)


3/4 cup spectrum organic shortening

1/2 cup brown sugar

2 Tbs white sugar

1 egg, room temperature (for vegan cookies use 4 1.2 tsp ener-g egg replacer blended with 6 Tbs water. you MUST put egg replacer in blender or processor & mix until frothy & thick!)

2 tsp vanilla

1 1/2 cups gluten free flour mix (I use Sarah's g/f flour blend. If your mix doesn't have xantahn gum, add 1/4 tsp.)

1 teaspoon baking soda

1/2 teaspoon salt

1 1/2 - 2 cups chocolate chips (I pretty much use the whole bag!) 


1. Preheat oven to 350 degrees.

2. In the bowl of your mixer, cream together shortening & sugars on medium-high speed until light and fluffy. Turn the mixer to low & add the egg and vanilla beating for another minute or so working up to medium-high.

3. In a separate bowl combine gluten free flour mix, baking soda & salt, mixing well. with your mixer on stir, slowly add the flour mix until it just comes together. Turn off the mixer and take the bowl out. Gently fold chocolate chips in by hand.

4. Place Tablespoon size dollops of dough onto a parchment paper covered baking sheet. Bake at 350 degrees for 7-9 minutes or just until cookies are a light golden brown around the edges. Remove from oven letting cool for a few minutes before removing to a cooling rack.


Fancy Food Thoughts contains some contextual affiliate links which advertisers have agreed to pay a commission if a purchase is made from that click-through. Everything I recommend are products I use & love!

Thursday, April 24, 2014

Banana Flax Scones

I absolutely adore scones. For as long as I can remember they've been one of my favorite indulgences. We have always been big tea drinkers in my family, and I cannot think of a more complimentary treat to eat with a cup of tea than a nice warm scone with lemon curd or jam. I lived in England for a few months for school during my college years, and there were eight girls living in my flat! I made scones once a week EVERY week we lived there. It was our special tradition and I will treasure those memories always. I haven't had scones for so very long, and I figured it was high time I figured out a way I could still enjoy this delightfully delicious treat.


Banana Flax Scones
  • 1/2 cup oat flour
  • 1/4 cup brown rice flour
  • 1/4 cup arrowroot/tapioca/cornstarch (non GMO)
  • 2 Tablespoons golden flax meal 
  • 1/4 teaspoon pink salt
  • 1/4 teaspoon baking soda
  • 1/4 cup Spectrum Organic Shortening
  • 1/4 cup almond or coconut milk
  • 1/2 teaspoon vanilla
  • 1 rip banana, mashed
  • 1/2-1 teaspoon cinnamon (optional)
  • 1 Tablespoon honey
  • 20 drops liquid stevia

1. Preheat oven to 350 degrees

2. In a medium bowl, mix oat flour, brown rice flour, starch of choice, golden flax meal, salt & baking soda. When flours are completely combined, cut in shortening and work it in with a fork until flour mix is coarse and crumbly. 

3. In another medium sized bowl mash your banana. Add the non dairy milk, cinnamon, vanilla, honey & stevia, mixing well. 

4. Add the dry ingredients to the wet, stirring well to combine. 

5. Using an ice cream scoop, scoop onto a cookie sheet lined with a silpat liner or parchment paper
Bake at 350 degrees for 17-20 minutes.


Fancy Food Thoughts contains some contextual affiliate links which advertisers have agreed to pay a commission if a purchase is made from that click-through. Everything I recommend are products I use & love!

Tuesday, April 22, 2014

Green Bean Chicken + Rice

I found this recipe a few years ago (check the original recipe out here) and my family absolutely loved it! I've shared it with many friends and it has become a great go-to meal for me! It only uses one pot, which means less dishes, and takes very little work! Although it's very, very simple, It's a seriously addicting meal.


Green Bean Chicken + Rice

  • 2 Tablespoons coconut oil
  • 1 1/2 pounds chicken, diced (I use boneless skinless thighs or breasts) 
  • 3 stalks celery, sliced
  • 1 large sweet onion, chopped
  • 2-3 teaspoons dried dillweed
  • 1 pound green beans, trimmed and cut (I've used fresh & frozen!) 
  • 2 cups basamati rice (cooking time is for white rice, brown rice will take longer)
  • 2 1/2 cups chicken stock (preferably homemade) 
  • 1 Tablespoon dijon mustard
  • 1 teaspoon salt
1. In a large stockpot or dutch oven, heat coconut oil to medium-high. Add chicken & cook until browned, then remove and place into a bowl.

2. Reduce heat to medium, add another Tablespoon of oil (if necessary) to pan, and then add chopped onion, sliced celery, salt & dillweed, cooking for a few minutes until the onion starts to become translucent. 

3. Stir in rice & cook for a minute more, then add chicken back in.

4. Add dijon mustard into your chicken stock & whisk to combine, then add to chicken & rice mix, bringing it all to a boil.

5. Once mix is boiling, *place green beans on top (do not stir them in!). Cover with a lid and reduce heat to medium low, letting simmer and cook for 20 minutes. 

6. When 20 minutes is done, turn stove off and let set for 10 minutes more. 

7. Stir everything together,  salt & pepper to taste, serve & enjoy!

*I like adding the green beans in early on because I like mine done all the way. If you want your green beans al dente, cook the rice mix for 10 minutes before adding the green beans.


Fancy Food Thoughts contains some contextual affiliate links which advertisers have agreed to pay a commission if a purchase is made from that click-through. Everything I recommend are products I use & love!

Monday, April 21, 2014

OMG Chocolate Chip Cookies! (Gluten Free, Vegan, Refined Sugar Free)

The thing I have missed most since eating differently are chocolate chip cookies. Is there really anything better than a moist, chewy, chocolatey cookie fresh from the oven? Here is the problem; My taste-buds wants Toll House. As you can imagine, I'm ALWAYS disappointed with the gluten free, dairy free, refined sugar free options. I mean, is it even possible to have chocolate chip cookies that don't taste like sawdust with those kind of restrictions? Until recently, the answer would have been NO, but this recipe puts the option of chocolate chip cookies back on the table. Preferably with a glass of ice cold homemade almond milk.

You may not believe what's NOT in them, but you also won't believe what IS in them!

It was quite the feat coming up with a soft and chewy chocolate chip cookie that was gluten free, vegan, refined sugar free, xanthan & guar gum free, and didn't use any processed egg replacer!
Seriously? It took me five gazillion tries. All fails in my book because they just didn't have that quality I was looking for. UNTIL, I finally said "OH MY GOSH! These are the ones." Then I shoved them down my husbands throat (ok, maybe he willingly ate them) and stared intensely at him as I waited for his every critique. He's not very critique-y, but I forced him to tell me EVERYTHING he thought of them. (I sound really pushy.) He chewed slowly, shook his head amicably and said "Mmmm. Yum. Good." My husband is not a caveman, I promise. But this was all I needed, because my husband looooovvvveeeesssss chocolate chip cookies more than any other dessert in the world. Mission accomplished.


OMG Chocolate Chip Cookies 

  • 1/2 Cup oat flour (I like THIS one! Sign up through my referral link & get $10 off!) 
  • 1/4 Cup brown rice flour (I've been using THIS brand & love the texture)
  • 1 Tablespoon coconut flour
  • 1/4 teaspoon baking soda
  • 3/4 Cup white navy beans, drained ( Crock Pot Beans Recipe, use water and leave out the salt & garlic!)
  • 3/4 Cup Spectrum Organic Shortening, melted
  • 1/4 cup coconut sugar
  • 2 Tablespoons honey (or two more Tablespoons coconut sugar) 
  • 15 drops liquid stevia
  • 1 Tablespoon vanilla
  • 1 Tablespoon golden flax meal + 2 Tablespoons water (make sure to use golden flax!!) 
  • 1/4 teaspoon salt
  • 1/2 cup favorite chocolate chips/chunks, homemade or store bought
  • 1/4 cup chopped walnuts (optional)

1. Preheat oven to 350 degrees

2. In a very small bowl mix golden flax meal with 2 Tablespoons water & let set for a few minutes while preparing other ingredients

3. In a separate small bowl, mix oat flour, brown rice flour, coconut flour & baking soda

4. In the bowl of a food processor, add drained navy beans, melted shortening, coconut sugar, honey, stevia, vanilla, salt & prepared flax meal. Process until very smooth, letting the processor run for about 30-60 seconds. Scrape down sides and process again for a few seconds if needed

5. Add the dry ingredients to the food processor and process for another 30 seconds, scraping down sides as needed. 

6. By hand, stir in chocolate of choice & walnuts if desired. Scoop the dough into tablespoon size dollops and place on a silpat liner or parchment paper 3 inches apart. You can also put the dough in the refrigerator for an hour and roll it into balls once it's chilled. Bake for 10-12 minutes or until edges of cookies are pale golden brown. Let sit on pan for 5 minutes after taking out of oven. Transfer to cooling rack and let cool completely.

I personally think these cookies taste the best once they've been out of the oven for about 15-20 minutes. They're still warm and so soft and gooey.

*I've made these a few times trying different things to see how they hold up, and they seem pretty versatile! I didn't have any navy beans on hand, so I used canned garbanzo beans (drained and rinsed) & they worked great! I'm pretty confident any white bean would work, they will just vary in taste slightly. I also tried them using 100% pure dextrose instead of coconut sugar & that also worked great!


Fancy Food Thoughts contains some contextual affiliate links which advertisers have agreed to pay a commission if a purchase is made from that click-through. Everything I recommend are products I use & love!

Thursday, April 3, 2014

Sweet + Salty Cinnamon "Kettle Corn" (No Sugar!)

I love sweets. You maybe already know this about me. Some people like their popcorn extra salty, I prefer to have the sweeter version. Since my sugar intake is close to nil these days, I'm looking for alternatives to some of my favorites. This cinnamon "kettle corn" is sweet, salty and delicious without one single bit of sugar! It takes about 10 minutes total to make and is such a great afternoon treat. The kiddos definitely approve.


Sweet + Salty Cinnamon "Kettle Corn"


  • 1/2 cup popcorn kernels 
  • 4 Tablespoon + 1 Tablespoon Coconut oil
  • 2 teaspoons cinnamon
  • 1/4 - 1/2 teaspoon salt 
  • 15-20 drops liquid stevia 

In a small bowl melt 4 Tablespoons coconut oil. Once melted, add liquid stevia and stir.

In a large pot with lid, melt 1 Tablespoon coconut oil on medium to medium high heat. Add popcorn kernels and place a lid on the pot. Once the popping starts, shake the kernels pretty constantly so they don't burn.  When the popping slows down or finishes, remove from heat. Drizzle coconut oil + stevia mix onto popcorn and mix. Add cinnamon and salt and stir until it's completely coating popcorn. Enjoy!


Fancy Food Thoughts contains some contextual affiliate links which advertisers have agreed to pay a commission if a purchase is made from that click-through. Everything I recommend are products I use & love!

Easy Minestrone Soup - (Gluten Free/Vegan)

I very much enjoy a good minestrone soup. This is a really simple recipe, and it's the perfect meal to make a day in advance for the next evenings meal. An added bonus is that it tastes even better the next day! There is no meat, so it's extremely budget friendly, but still very filling because of all the hearty veggies and mung beans.


Easy Minestrone Soup

  • 1-2 Tablespoons coconut oil or olive oil
  • 1 small yellow onion, chopped
  • 4 cloves garlic, chopped
  • 1 pound carrots
  • 2 medium yellow squash
  • 2 medium zucchini squash 
  • 1 15 oz can crushed tomatoes (I've used fire roasted & regular!) 
  • 1 pound frozen green beans
  • 8 cups vegetable stock (or chicken stock!) 
  • 1 cup mung beans or green lentils (soaked overnight!) 
  • Salt and pepper to taste
*Make sure you soak your lentils or mung beans overnight prior to making soup. If you forget, you can do a quick soak by washing your beans or lentils, bringing them to a boil in a medium saucepan and then reducing heat and simmering on low for 15 minutes. They will cook a few minutes longer once you add them to the soup, so don't worry if they're not completely soft after the quick soak.

Heat oil on medium heat in a large stockpot. Add chopped onion, garlic, salt and pepper and cook for 7-8 minutes until onions are softened and garlic is browning. Add chopped carrots and cook a couple minutes more. Add vegetable or chicken stock, crushed tomates, zucchini, yellow squash and frozen green beans and simmer on medium low until veggies are tender. Once soup is almost done, add lentils or mung beans, cooking just a few minutes more until lentils/beans are soft. Add more salt and pepper as needed, serve & enjoy. 


Fancy Food Thoughts contains some contextual affiliate links which advertisers have agreed to pay a commission if a purchase is made from that click-through. Everything I recommend are products I use & love!


Monday, March 31, 2014

Almond Pulp Cinnamon Raisin Crackers - Grain Free/Vegan

The almond pulp I have left over after making almond milk starting piling up in the fridge and I was looking all over the place to find recipes to use it up. I strangely didn't find anything that looked appealing and the things that did look good said you had to dehydrate the almond pulp before using it….ain't nobody got time for that. So I decided to put a spin on the usual cracker recipe that I like which uses almond meal and work with the almond pulp I had. The cinnamon raisin crackers I came up with are super yummy! My kids L O V E them. Seriously, I can't get them out of the oven fast enough, and the entire batch of crackers would be gone in one day if I didn't purposefully save some off to the side for snack time tomorrow. Too much almond pulp? No problem.


Almond Pulp Cinnamon Raisin Crackers - Grain Free/Vegan
  • 2 Cups almond pulp
  • 1 Tablespoon arrowroot powder
  • 1/4 teaspoon salt
  • 1/4 teaspoon baking soda
  • 1/2-1 teaspoon cinnamon
  • 1 Tablespoon flax meal
  • 3 Tablespoons coconut oil 
  • 2-3 Tablespoons raisins 
First, pulse the almond pulp, arrowroot powder, salt, baking soda, cinnamon & flax meal in the bowl of your food processor. (I have this model and don't know what I'd do without it!) Add the coconut oil & pulse again until fully incorporated. Last, add the raisins and pulse just a few times leaving big chunks. 

Roll half the dough at a time out between two sheets of parchment paper, making sure it's very thin. Put the dough, still on the parchment paper, onto a baking sheet and bake at 350 degrees for 7-10 minutes. When the edges start to brown, remove from oven. Using a sharp knife, gently cut the crackers. Once cut, flip then over and return to oven. Continue checking every 2-3 minutes removing the crackers as they are done. (The middle ones always take longer.)

Enjoy!


Fancy Food Thoughts contains some contextual affiliate links which advertisers have agreed to pay a commission if a purchase is made from that click-through. Everything I recommend are products I use & love!

Dairy Free Lasagna - Gluten Free/Vegan Options


I all but gave up on lasagna long ago when I stopped eating dairy. It just didn’t seem like it was possible to have a delicious satisfying dish without cheese. I’ve learned over the years to be more content living without, but believe me, after eating this dish, you will not be missing cheese at all because you will fully believe you are eating ricotta!
This lasagna is full of homestyle italia goodness and whenever I make it, everyone begs for the recipe! I also love how diverse this can be. If you’re vegan, just omit the meat. If you’re gluten intolerant, use gluten free lasagna noodles!


DAIRY FREE LASAGNA (WITH GLUTEN FREE AND VEGAN OPTIONS)


2 Tablespoons olive oil or coconut oil
4-6 cloves garlic, minced
1 large brown onion, diced
3-4 assorted baby bell peppers, diced
2 packages crimini mushrooms, cut in slices
3-4 zucchini’s chopped
1/2 cup baby spinach, chopped
1 lb hamburger (omit for Vegan option)
3 or 4 fresh basil leaves, finely chopped
1 lb can of marinara or your favorite pasta sauce
1 28 oz can tomato sauce
9-12 lasagna noodles (Or use Gluten Free Option) cooked, drained & rinsed OR use no boil noodles
Salt and pepper to taste
1 recipe vegan ricotta cheese (see recipe below)
First, prepare vegan ricotta cheese. This can be done a day or two in advance and stored in an airtight container in the fridge.
In a large pan saute garlic, chopped peppers, and onions in olive or coconut oil until tender.
Add mushrooms & zucchini and cook until juices start flowing.
Add baby spinach and cook a couple of minutes longer until the spinach is wilted.
In another pan brown hamburger (if using meat. You can also add extra garlic & onion to the browning beef if desired) and when it’s finished add the marinara & tomato sauces bringing to a simmer. Add chopped basil, salt and pepper to taste.
To assemble lasagna, the pattern is sauce, noodles, ricotta, then veggies.
First spread a thin layer of pasta sauce in bottom of a 9×12 inch dish. Place lasagna noodles in the bottom of pan. Spread vegan ricotta over each noodle, add a layer of veggies, (drain off liquids from the veggies) then add a layer of sauce. Repeat for 3-4 layers depending on how deep your dish is.
Cover with tin foil and bake in a 400 degree oven for 40-45 minutes or according to the instructions on the box of lasagna noodles used.


VEGAN RICOTTA
1 3/4 cups raw cashews soaked 30 minutes or over night in water just to cover
1/4 cup lemon juice
1/2 cup filtered water
4 Tablespoon olive oil
2 cloves garlic
1/2 teaspoon dijon mustard
1  teaspoon salt
Pulse garlic in food processor or blender until chopped. Add remaining ingredients and process/blend until thick & smooth. Can be placed in an airtight contained and put in fridge a couple of days before using.


Fancy Food Thoughts contains some contextual affiliate links which advertisers have agreed to pay a commission if a purchase is made from that click-through. Everything I recommend are products I use & love!


Friday, March 28, 2014

Vegan Strawberry Milkshake + Homemade Almond Milk

Springtime is such a wonderful time of year. I love all of the fresh berries that come into season, but my very favorite are strawberries. I've been making tons of almond milk recently and thought how yummy a strawberry shake sounded. Did you know that strawberries have very few grams of fructose compared to other fruits? Only 3.8 grams per cup! That's pretty amazing if you ask me. This simple strawberry shake only has two ingredients and makes the perfect afternoon snack when you're craving something sweet but don't want to overload on sugar!


Vegan Strawberry Milkshake - Serves 1

  • 1 Cup frozen strawberries (make sure they don't have added sugar!)
  • 1 Cup homemade almond milk
  • Stevia to taste (optional!) 

Blend together & enjoy!


If you've never made your own almond milk, I highly recommend it! It is very simple and the most delicious almond milk I've ever had! A big plus is that there is nothing in it but what you put in it! The almond milk you purchase from the store has lots of preservatives and additives! This is such a yummy alternative.


Almond Milk

  • 1 Cup raw almonds and filtered water to cover
  • 3 Cups filtered water
  • 1/4 tsp vanilla (optional)
  • 1/4 tsp cinnamon (optional)


Place one cup of raw almonds into a glass bowl or measuring cup & cover with filtered water. Add a few pinches of salt to keep the water from getting moldy. Let sit overnight or for at least 8 hours.
When the almonds have finished soaking, drain off water & place them in your blender with 3 cups filtered water. Blend for a couple of minutes. When it's finished, pour into a nut milk bag (I use this one!) that's draped over a wide mouth glass measuring cup and let the almond milk steep through following the directions that came with your nut milk bag. When the pulp has been strained out, return the almond milk to blender & add  vanilla and cinnamon if desired, blending for a few seconds just to combine. Store in an airtight glass jar and refrigerate.

Don't forget to save the pulp to use in my Almond Pulp Cinnamon Raisin Crackers (Grain free/Vegan)!


Fancy Food Thoughts contains some contextual affiliate links which advertisers have agreed to pay a commission if a purchase is made from that click-through. Everything I recommend are products I use & love!

Thursday, March 27, 2014

Homemade Croutons/Breadcrumbs! (Gluten Free Option!)

Oh croutons. What kid didn't pick every single one of those buttery, ranch flavored croutons out of the salad they weren't going to eat? While the days of packaged croutons are out of my life for good, I am not saddened. Homemade are so much better. And simple. Use whatever type of bread you want! Gluten free, sourdough, whole wheat….they all work.


Croutons/Breadcrumbs

  • 2 Cups bread of choice, cubed* (see note for finer breadcrumbs)
  • 1-2 Tbs coconut oil or butter if you eat dairy
  • 1/4 tsp sea salt
  • 1/4-1/2 tsp italian seasoning
  • garlic powder to taste
  • onion powder to taste

In a medium size saute pan melt coconut oil or butter over medium heat. Add cubed bread and salt and stir to coat in oil/butter. Continue cooking and turning bread for 15-20 minutes, checking frequently to make sure the pan isn't too hot and they're not burning. Once desired crispness is attained, add garlic powder, onion powder & italian seasoning if desired. Stir to coat & remove from heat. They will harden more once cool. Use to top salads or as breadcrumbs where called for. Store in an airtight container once completely cool. 

*For making finer breadcrumbs, toast the bread before you begin & roughly grate it before browning it in the pan.


Fancy Food Thoughts contains some contextual affiliate links which advertisers have agreed to pay a commission if a purchase is made from that click-through. Everything I recommend are products I use & love!